This will be the first in a series of articles that will chronicle Guided Discovery's construction from start to finish, which we hope will occur in late fall 2013. The boat will be delivered with 2014 build date.
 |
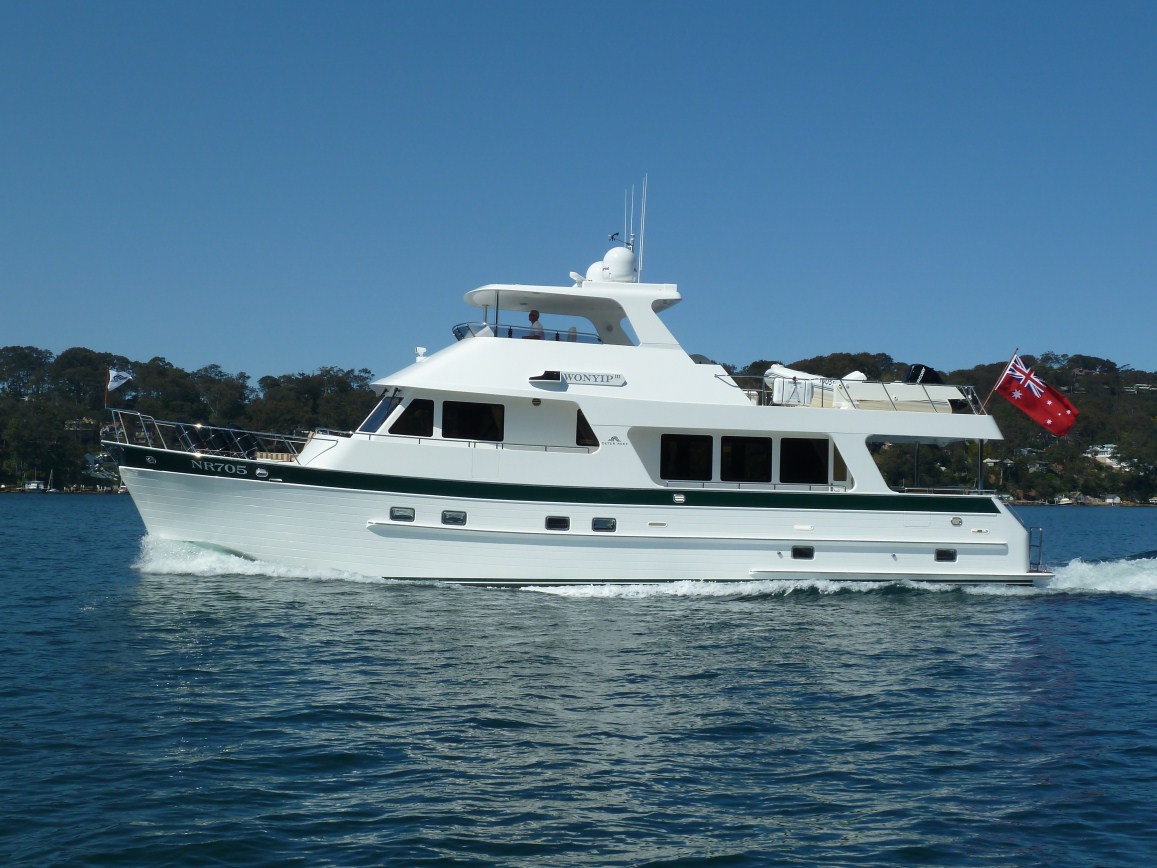
| Photo of the finished product |
But first some background. We contracted to build the boat in early November and received our first photos on December 14. Outer Reef provides weekly photos showing construction progress. I've heard that many owners anxiously await their "Friday Fix." You can include us with this group.
So without further ado, here goes. The photo below gives you a sense of the boat's size. She's 63 feet long and 17 feet wide. The photo shows workman layering fiberglass along the port side of the hull. The blocks on each side are the port holes. There are six to starboard and seven to port.
 |
| Looking aft as workers apply fiberglass mat over the gelcoat |
The boat is built in a clam shell mold.
 |
| 63 LRMY mold |
The quality of the mold determines the smoothness of the hull. If you could see the mold's insides you would see that is red in color and highly polished. The process starts with waxing the mold and applying a releasing agent prior to applying the first gelcoat layer. The gelcoat is the smooth shiny surface of the hull that we see from the outside. The gelcoat is sprayed into the mold and the thickness is tightly controlled.
 |
| After spraying gelcoat into the mold |
Photos 1 above and 3 below show the workmen laying up fiberglass. Essentially, resin, a two-part polyester, is mixed with a hardener and applied to the gelcoated surface. Then s
heets of fiberglass matting are laid into the mold. Then more resin mixture is added using a brush or roller. The material must conform to the mold, and air must not be trapped between the fiberglass and the mold. Additional resin is applied and additional sheets of fiberglass are layed-up until the desired thickness is achieved. Hand pressure rollers are used to make sure the resin saturates and fully wets all layers, and any air pockets are removed. The work must be done quickly enough to complete the job before the resin starts to cure. Notice that the workmen are wearing masks.
 |
| Workman laying up fiberglass over Divinycell coring |
The methodology described above is used for the hull from the keel up to 6" above the waterline to produce a hull structure that is solid fiberglass of approximately 1 1/2 inch thickness.
 |
| Fiberglass matting waiting to be applied to the hull |
The same process is used to produce the starting layers for the hull sides (i.e., 6" above the waterline to the gunwhale). Then cored fiberglass is applied using a vacuum bagging process to produce a rigid hull structure that is light weight as compared to that used below the waterline. The following are the materials that are use to laminate the hull sides:
- Gelcoat
- 300 g/m Mat
- 450 g/m Mat
- 600 g/m Woven Roving
- 800 g/m Woven Roving
- 3/4" PVC Foam
- 1/2" PVC Foam
- 1/4" Balsa
- 30 g/m Surface Mat
- Epoxy Paint
These materials are then used in accordance with a lamination schedule that dictates the sequence in which the various layers are applied. The process used to apply the PVC Foam (Divinicell) is called vacuum bagging. The "secret" is to get full penetration of the resin into the coring air spaces. This achieved by placing vacuum blankets over the coring and using a vacuum to suck the resin into the coring.
 |
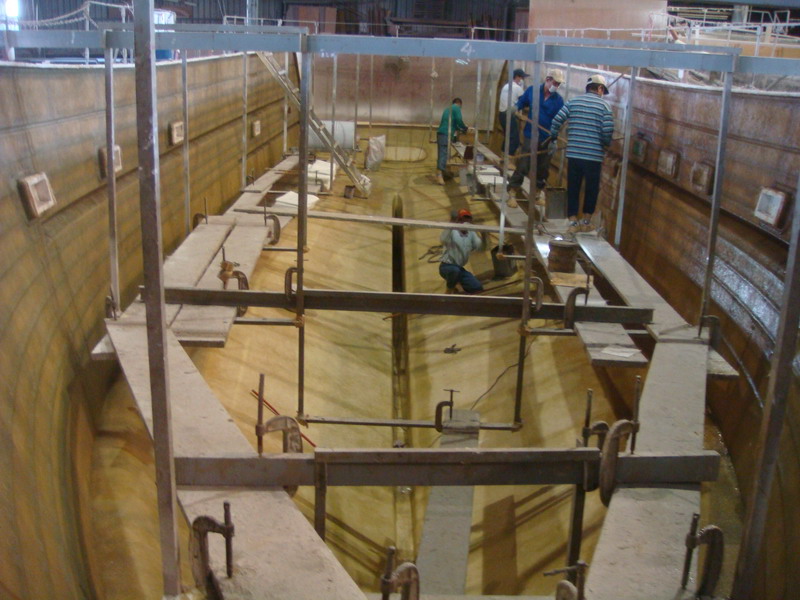
| Week 3 photo showing lay-up of vacuum bagged cored fiberglass |
The coring, called Divinycell PVC, is 3/4 of an inch thick. The outer hull thickness above the solid hull lamination is about 3/8" to 1/2" thick. Then the coring and the FRP (Fiberglass Reinforced Polymer) inside over the coring is 1/4" to 3/8" thick. The result is an overall hull side thickness of about 1 1/2" to 1 3/4" thick.
 |
| Week 4. The hull lay-up is complete |
Epoxy paint is applied as the final layer to provide a protective coating. The photo above show the completed hull lay-up. The next installment will deal with lofting the stringers and bulkheads.
Written by Les


No comments:
Post a Comment