Meanwhile this week's photos are very exciting. The big event that I had been expecting for weeks finally happened. The yard mounted the flybridge and boat deck assembly to the house.
Other progress is found in the salon where the yard corrected last week's incorrectly installing teak bullnose with the correct wenge. The other significant progress is in the pilot house where we can see the beginnings of the control panel.
Let's start with the flybridge and boat deck assembly. Last week we saw it finally turned right side up on the yard floor. This week the assembly was secured to the hull with 3M Marine Glue and stainless steel bolts spaced approximately 6 inches apart. The attachment area is probably in the process of being glassed over and gel coated.
The flybridge / boat deck assembly facilitates the fully covered aft deck, a visor over the flybridge and acts as covers over the port and starboard walkways.
 |
| 1. Hull with flybridge / boat deck assembly attached to the house |
 |
| 2. Flybridge as viewed from the boat deck. Note the control station (center) and hatch leading to pilothouse stairwell (right). Storage areas are visible to starboard on the boat deck |
 |
| 3. Great view of the fully covered aft deck and port walkway visible. Stainless steel support posts will ultimately be installed Boxes on the port walkway under salon windows are air intakes for the engines |
 |
| 4. VIP. No change |
 |
| 5. Guest stateroom. No change |
 |
| 6. Master SR looking forward. No changes |
 |
| 7. Master SR look to port. End tables tops are protected |
 |
| 8. Master SR looking aft. Cables in port hanging locker are bundled |
 |
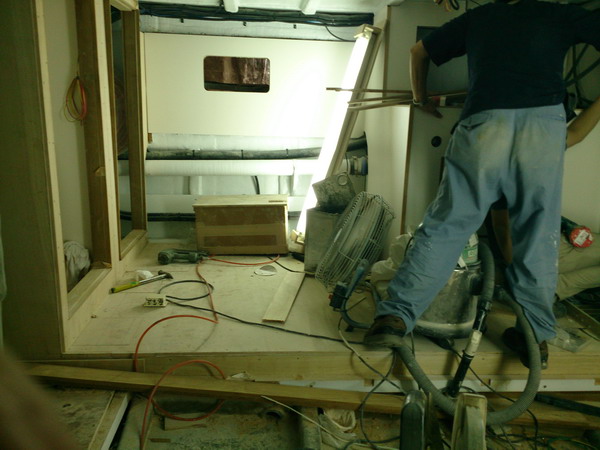
| 9. Pilothouse with instrumentation cutouts and platform for Stidd helm chair |
 |
| 10. Pilothouse looking to port with satin finish on settee frame. Storage area behind settee cushion An appliance just to the left of the worker may be the microwave oven |
 |
| 11. Galley looking to port. Cabinetry for microwave is new |
 |
| 12. Salon looking forward. Teak bullnose replaced with wenge |
 |
| 13. Salon looking aft. Wenge tops and bullnose. Window boxes being constructed |
 |
| 14. Engine room looking forward. Note the hoses and cables by the hatch. Louvers for fire suppress system. Hydraulic system valves and couplings in box forward of the hoses. |
 |
| 15. Engine room looking aft. Parallel switch panel and gauges for generator installed on port bulkhead Overhead lights installed |
 |
| 16. Lazarette looking to starboard. Workbench and port hole with dead light installed. Storage cabinet doors visible to your right |
 |
| 17. Lazarette looking to port. Again storage cabinet doors visible to your left. Freezer will be installed aft of the auxiliary fuel tank |
 |
| 18. Lazarette looking aft. New storage cabinet door fame to starboard
|
There are now 5 weeks until my visit to the shipyard (10/10 to 10/18 including travel) and 12 weeks to expected completion at the end of November.
Written by Les.
Finally caught up! Looking great. Hope your trip is fun, Les. Best to both of you from Rick and me.
ReplyDelete